| 3dpBurner2 Bill Of Materials *Download here a Excel file for dimension calculations. | ||
| Part Name | PCS | NOTES |
| PRINTED PARTS | ||
| 3D printed parts kit | 1 | Download or Get printed kit |
| BEARINGS AND BELTS | ||
| 623ZZ bearing | 4 | 623 dimensions=3x10x4mm |
| LM8UU Linear Bearing | 6 | |
| GT2 pulley 20 tooth | 2 | |
| GT2 belt for X axis | 1 | lenght=("xTravel"*2)+255 |
| GT2 belt for Y axis | 1 | lenght=("yTravel"*2)+255 |
| NUTS, BOLTS AND WASHERS | ||
| M3 hexagonal Nut | 28 | |
| M3 washer | 27 | |
| M3x10 cap bolt | 15 | |
| M3x20 cap bolt | 31 | |
| M8 hexagonal Nut | 12 | |
| M8 washer | 12 | |
| RODS | ||
| M8 threaded rod (for bridge, threadedRodBridge) | 2 | lenght=("xTravel"-6mm) |
| 8mm smooth rod (for bridge, smoothRodX) | 2 | lenght=("xTravel"+67mm) |
| 8mm smooth rod (for base, smoothRodY) | 2 | lenght=("yTravel"+98mm) |
| TABLES (MDF 10mm thickness) | ||
| tableTop | 1 | (xTravel"+25mm) by (yTravel+100) |
| tableBotom | 1 | (xTravel"+45mm) by (yTravel+100) |
| ELECTRONICS | ||
| NEMA17 stepper motor 200steps/rev (1.8º step angle) | 2 | The cheapest one (use at least the 34mm length ones for prevent torque issues, the lower length the lower mass to move for X axis). |
| kw11 type limit switch | 2 | Not mandatory, only recommended. (dimensions about 7x10x20mm) |
| 12v 40x40 fan | 1 | |
| Arduino UNO with USB cable (or compatible board) | 1 | |
| Arduino CNC shield GRBL compatible | 1 | *Check NOTE5 of 3dpBurner1 BOM page. |
| Power supply 12v | 1 | 2A min but recommended 3 or 5A. |
| Pololu A4988 based stepper driver with heatsink | 2 | |
| Some wires, heat shrink, double side tape, ties… | -- | |
| LASER | ||
| laser module (i use NDB7875) | 1 | *Check NOTE1. NDB7875 datasheet. |
| Laser heatsink | 1 | *Check NOTE2. |
| Laser driver | 1 | *Check NOTE3. |
| 4k to 10k 1/4W standard resistor | 1 | *Check NOTE4. |
| *It´s recommended to get some spare M3 hardware (nuts, bolts and washers). *It´s recommended to use AWG24 silicone type cables for wiring, they are very flexible with a much better endurance and quality than usual ones. You can buy them on sites like Ebay (get black and red colors). Once you test this cable type probably you won't return back again :) | ||
NOTE1: -DON'T CONNECT/POWER YOUR MODULE UNTIL YOU FULLY TUNE YOUR LASER DRIVER. Laser can be fried very easily. -Laser module= LaserDiode+12mm LaserHousing+Focusable laser lens. -Im using a "445nm 9mm Diode In Copper Module W/Leads & Three Element Glass Lens" from here https://sites.google.com/site/dtrlpf/home/diodes/9mm-445nm -Avoid the G2 lens, i'm getting better results with the cheapest three element glass lens (g2 lens produce more optical power but on a bigger spot). NOTE2: The Latest X carriage is designed for fitting the heatsinks listed here. |
NOTE3:
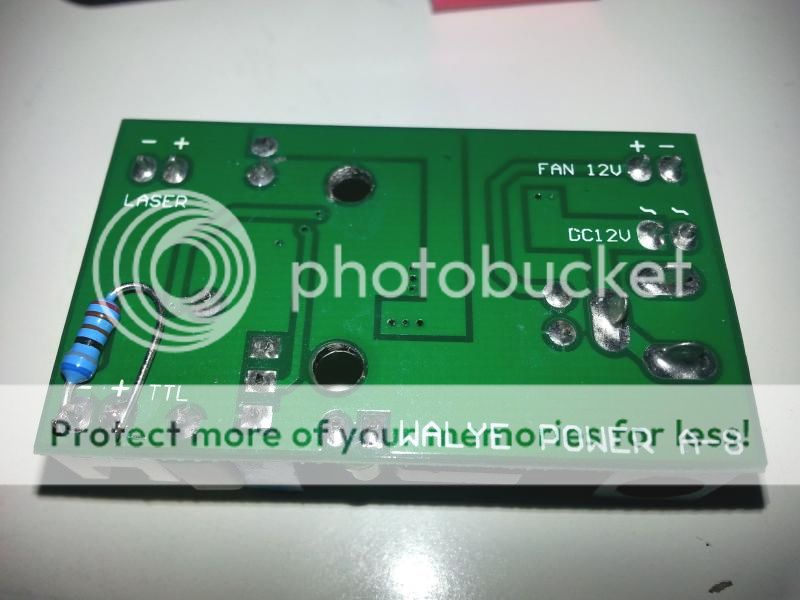
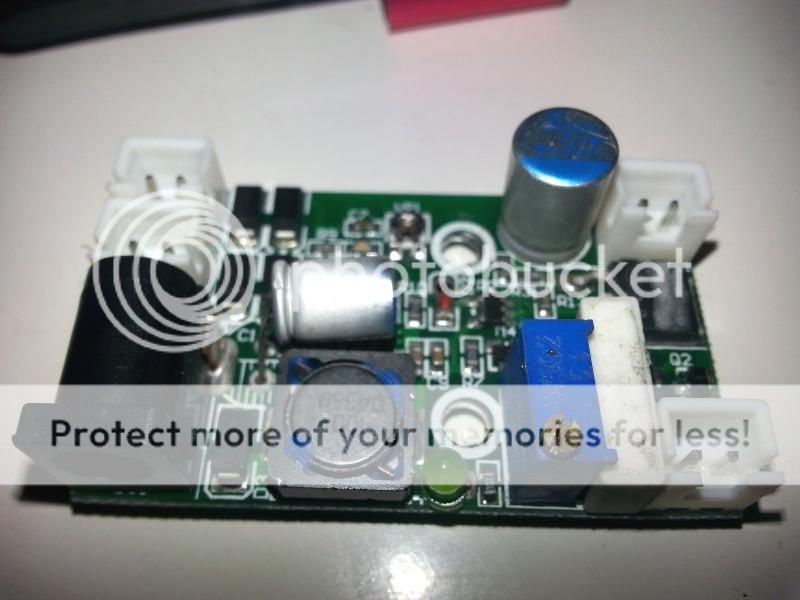
Laser driver should be TTL compatible and if you want to control the laser intensity also PWM compatible. I'm using this one (PWM and TTL) found on Ebay (back resistor is added by me, see NOTE4) .
NOTE4:
Pull down resistor is used for prevent the momentaneous laser powering on when Arduino resets and put the driver input control at high impedance state.
NOTE5:
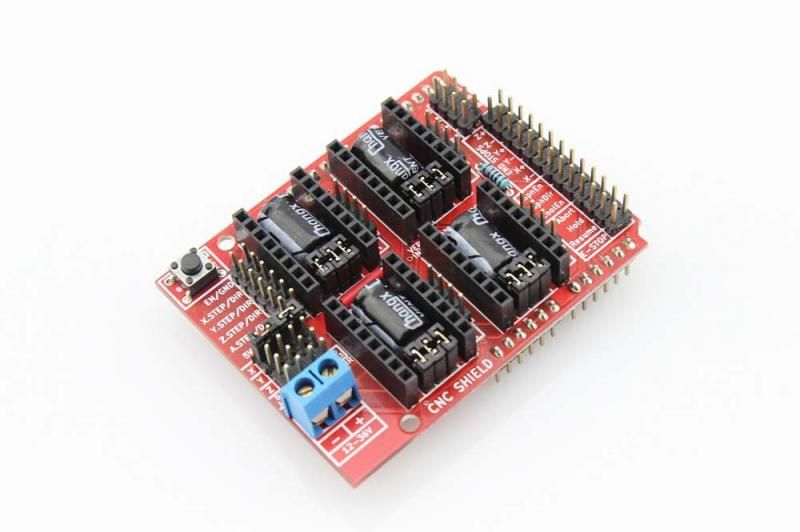
I'm using this one (search by Arduino CNC Shield):
CUTTING RODS:
You can buy directly a large bar of smooth rood and cut to size, Make a small chamfer at the ends.
On threaded rods need to do the chamfer and screwing and unscrewing a M8 nut several times at the ends so that the cut thread just right.
TABLE DRILLING DETAILS:
Cut the tableTop and tableBotom as needed for your custom working area. Use a 4mm drill to make the holes. The best accuracy is obtained by tracing the two central axes and marking all main measurements from these. All measures are in mm.
Top table (tableTop)
A=(xTravel-1)/2
B=(ytravel+78)/2
Detail of recess for hiding the bolts cap of the top table.
Botom table (tableBotom)
A=(xTravel+17)/2
B=(yTravel+48)/2
C=(xTravel-7)/2
D=(yTravel+72)/2
E=31.5
F=(yTravel/2)+34
G=(yTravel/2)+18
H=18
Example dimensions for A4 and A3 working areas (mm)
| Item | A4 (210x300) | A3 (300x420) |
| threadedRodBridge | 204 | 294 |
| smoothRodX | 277 | 367 |
| smoothRodY | 398 | 518 |
| tableTop | 235x400 | 325x520 |
| A | 104.5 | 149.5 |
| B | 189 | 249 |
| tableBotom | 255x400 | 345x520 |
| A | 113.5 | 158.5 |
| B | 174 | 234 |
| C | 101.5 | 146.5 |
| D | 186 | 246 |
| E | 31.5 | 31.5 |
| F | 184 | 244 |
| G | 168 | 228 |
| H | 18 | 18 |


